Having a Look at the Basic Print Feature Within the AM.CO.ZA Software (Part 3)

inkrip basic printing
When it comes to software that works with Raster Image Processors, the print feature becomes rather important.
This video is part of a Mini-Series that covers the basics of the InkRIP Software.
Next video covers Add Image.
Previous video covered New, Open & Save Canvas.
Video Transcript
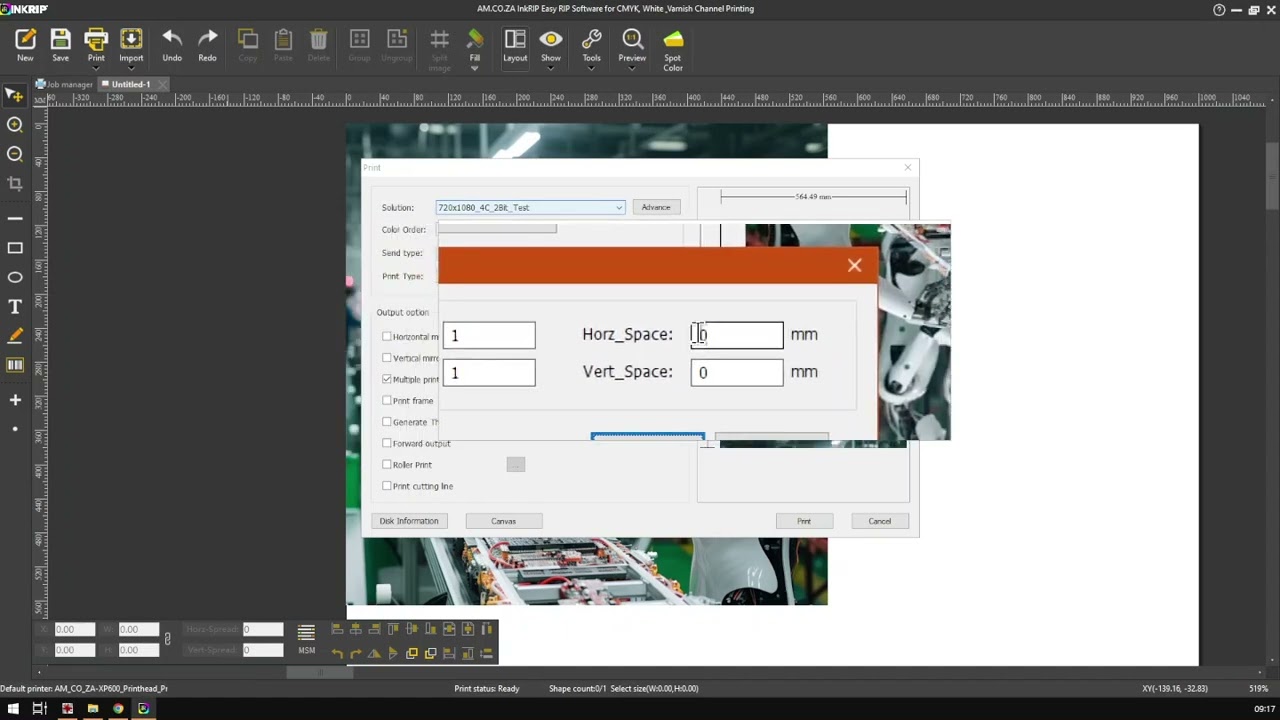
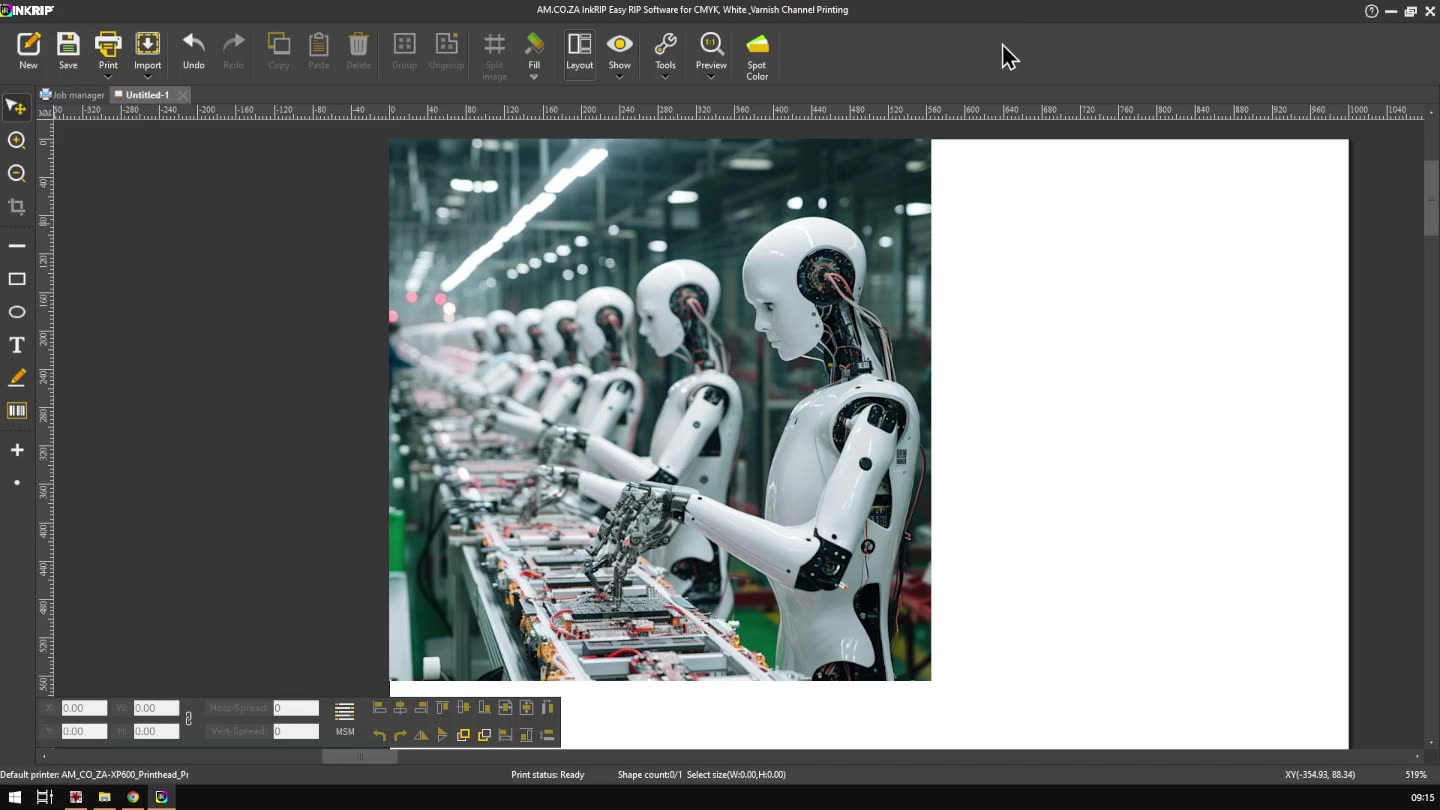
Hi there guys. In today's video, we're going to be looking at the print or encrypt. But before that, let's have a quick intro first. So, today's video can be found on softwaretraining.co.za. We make short and easy to watch problem solving videos, and we also have daily updates. Now if we have to get into the programme, yeah. Let's just get our shortcuts working. There we go. OK, so you can see currently we have an image in here and let's say we wanna print it. And now, obviously, the print button will only work if we have something changed, otherwise, it'll be greyed out. So if there's nothing to be printed, you can see that it's greyed out. We can't click it now. So, so I'm gonna undo that. So now, there's a few things to keep in mind when printing, but we'll run through all of those um in a short moment. So, first of all, we're gonna click the print button and this will pop us up the print dialogue. On top here, we have the um some basic resolution, some ICC uh profiles and stuff like that we can set, but this we're gonna look into later. It's a little bit advanced for now. So for this, just leave that at default. And then, um, first thing we're gonna be looking at is the actual printing type. So, if I zoom in here. You guys can see we've got a drop-down menu with two options. We've got file and then we've got TCP IP. So, under file, something to keep in mind is if we're gonna be printing with a file, we're gonna have to save it first. So it's gonna prompt us where we wanna save it. And then if we wanna um do it over a network for the TCP IP we're gonna go to settings and then we'll set up the network. I'm not gonna do that now, but we're just gonna keep ours on file for now. Then we've got the print type which we're not gonna go into now. We'll just leave that at default as well. Then under that, we have a few different settings we can actually adjust. So, uh You guys can see here, we've got the horizontal mirror. So, if you look on the image on the right, if I click that, it will mirror horizontally, vertical. We've got multiple prints, which could be a handy one. If you check that, just make sure you go in here and set the parameters for this. So, how many do you want on, let's say horizontal. You want to have 2 or 3 depending on if you're running a roll or not, and then you can do some horizontal spacing between them as well. It's all handy. We've got print frames, if you wanna print a frame on uh onto that. Then we've got forward output. You can see this kind of just puts it the same way it was in the programme. Go for roller print if you wanna set up that, and then we've got print cutting line. So, um, yeah, so if you need to set those things as well, we do it under the output options. And then, um, something to keep in mind with the file, sending type. We're going to file, it's gonna obviously uh first generate a file, so which means there's gonna be a little bit more space. And uh you also have to do that extra process. If you got TCP IP it's not gonna generate a file, which means it's just gonna keep in your memory, so it's a little bit more resource hungry. But it's a bit faster return because you don't have to do the extra step. And uh so that is something to keep in mind with that. Let's just quickly look at where do you see the actual progress. So let's say we've got this and we wanna print it. Let's say we've set up everything we like, I'm just gonna leave this on and we say print. Then like I mentioned, it's gonna prompt us where we wanna save it. So I'm just gonna have this. Uh, from this. And then the file format is only one PRN, click save and now what's gonna happen, it takes us to our job manager. An important thing over here, we can see the actual progress. So once this thing reaches 100%, That's how we know the job is done. So, we can see the status is printing and the progress is 50, 4, and then the time it takes. You can also see some other information where it's saving it to, which printer it's using, and so forth, also the date. But this is the important thing, just keep in mind the progress so you can see when it's done and once it's 100%, it should be done. If you wanna remove something, you can just simply click here to delete. Say yes. And also, if your file is busy, so let's say it is busy printing, and then you can simply click that stop. Let's say you need to make changes and you don't want to complete, you click stop and it'll stop the job where it was at. So, I'm just gonna delete that, remove that, go back to our actual project and go to the print setting. Now, another thing that is uh rather important to note. I, let's say our canvas here is of the actual cutting or printing area. And what's gonna happen is once we click print, it's got everything set up, then it's actually gonna prompt you with a warning message that your canvas is overlapped. So just keep that in mind, so if you get this error, it's because your actual uh printing area for your image is off the canvas, so it's just telling you it's gonna basically be automatically cut off wherever it's overlapping. You can say do not display this dialogue if again, if you use this often, and you know what you're doing. I'm gonna say cancel and move this one back to where it was. So that is also handy. When it comes to the actual progress and the speed it takes, this is gonna vary depending on size of your canvas. So if you've got a large canvas or a large image, and the printing time is gonna take longer. So just keep that in mind. It's not, it doesn't have a set time, that will depend on your image and the quality. And size. But yeah, otherwise, that is you know printing, pretty straightforward. You can obviously deep dive into some of these settings, play around with them depending on what you're looking for. But uh everything is pretty straightforward. You can also see the measurements here on the preview thing if you have to. Otherwise, though, in the meanwhile, if we head here to softwaretraining.co.za. za, you guys will notice we've got a variety of different softwares we do cover, and you can also isolate your search on the top right. If you do not, however, find the training videos you're looking for, just simply go here, request a training video, fill in the new form, and then we'll do our best to try and make that for you. But otherwise, thanks guys for watching and cheers.