SAi FlexiSTARTER 19 Selecting the Path Points (Part 7) Working with Paths Mini-Series


flexistarter select path points
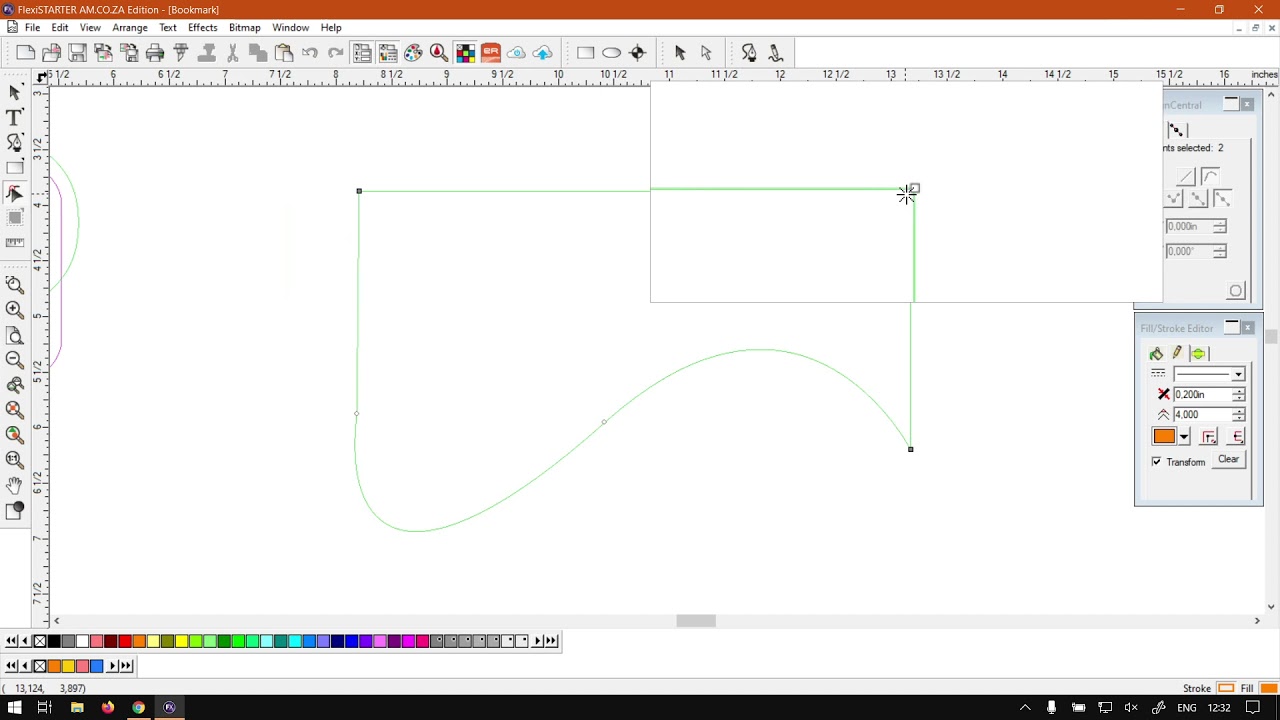
Being able to select path point in the program is key for making any custom shape changes to you path objects.
You might be happy to find out that the path point selecting feature has quite a few handy ways to go about when making selections.
This video is part of a Mini-Series.
Next video covers Box & Inclined Bounding Select.
Previous video covered Converting Shapes to Paths.
Video Transcript
How are you guys in today's video? Flexi starter. We're gonna be looking at selecting the party points, but before that, let's have a quick intro first. Mm, yeah. Okay, so today's video can be found on softwaretraining.co.za. Today we make sure that easy to watch problem solving videos, and we have daily updates. Otherwise, we're back in the programme here. Now, when it comes to selecting path points, it is rather simple. But there's a few things we can do to navigate through them and so forth, which is good to know. But then before we start dialysis quickly, should I say just let me just quickly remind you guys, this is a miniseries. I'm working with parts and I will leave relevant links in the description. So you guys can actually thought it was long. Now, for the sake of, uh, this little tutorial, I'm just gonna switch the views. If we go on the view here we go to the first option, which is show false. It's just gonna show us the outlines you can say so it's easier to work with it. So let me zoom on this shape we've got so now, obviously, with your shape selected. What? You want to go navigate you on your main menu to this little arrow with a red circle? That is the select 0.2. Shortly before as in as you can see. So now, as you can see here on our canvas, we've got all these little points. Now, to select the point, you simply just click on it, you'll see the icon changes. And then if you click on it, these, um, you'll go see us from a white icon goes to a black one. So then, um that is how you can kind of see what it is. And then also the difference between, uh, curve point, you can say, and a straight point straight point, as you can see, is just a simple square where the curve ones got lost circle. And if you click on it, you will also see the control arms forward. Same with this site, and then also you can easily navigate through them. It's just simply press tab. You can see how we're popping from point to point. And if you wanna go the opposite direction, he just keeps shifting. You press tab again. So this is great. If you have to make custom editing and then you just quickly jump from point to point it is through them. And then, if you wanna say, like, multiple points, you can always keep. I will select the point he keeps shifting. Select the other points you want. You'll see these ones are all I am black now, so you can know which ones are selected. But one thing to keep in mind, you cannot navigate through them with tap, as you can see now, Tab is completely useless. Same with shift tab. It will not pop through them. Otherwise, that is it on the basics of selecting points. So once again, just quick recap. You're gonna need your select 0.2, which is your your main toolbar and then select them on your shape just by normal. Left clicking, it's a square. Ones will be just a normal straight point, and anything with a round circle will be curved points or curved segments. Then you can navigate through them with shift and shifted to navigate. Counter clock works so clockwise counterclockwise, and if you keep shifting, you can select multiple points. Well, that is about it Otherwise we had year to softwaretraining.co.za z. You guys all know that we've got a variety of from software's to to cover, and you can also isolate your search on the top of right. If you do not have ever find what you're looking for, you can always go here, request the training video. Then we will make that video for you. But otherwise thanks, guys for watching and chips.