Finalizing Your Print Ready Files Within the SAi FlexiPRINT UV 22 Software (Part 9)

flexiprint uv print ready files
Now after all the setup of different Features and options, adding graphics and setting up custom channels, what comes next?
The next step on or list will be where it all comes together, and that will be preparing the file for print.
This video is part of a Mini-Series.
Previous video covered Bleed and Choke.
Video Transcript
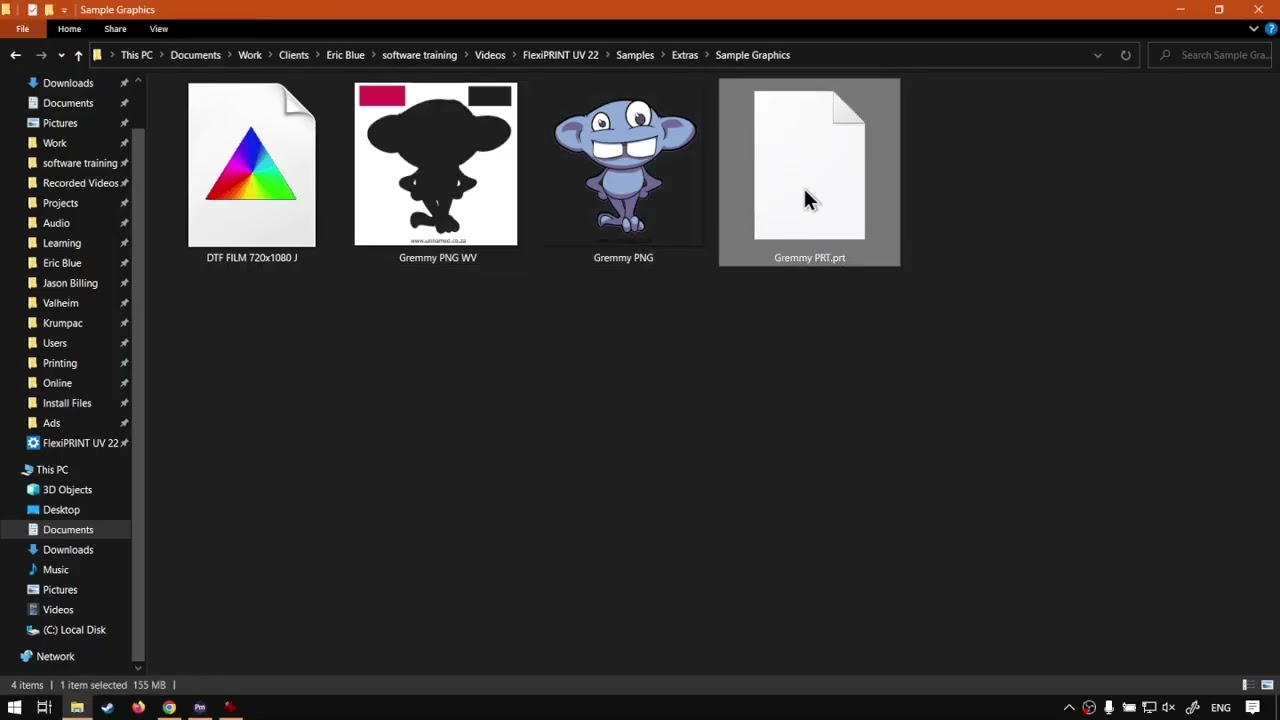
Alright, guys, In today's video, we're gonna be looking at how to finalise your job and your design and get it ready for print. And this will be for flexi print software. But before that, let's have a quick intro first. So today's video can be found on softwaretraining.co.za. co dot Z A. We make short and easy to watch problem solving videos and we also have daily updates. So otherwise we're back into the programme here. So now let's say we've got our design here, which we've set up. We've set the bleeds, chokes all of that. Now we wanna get it ready for printing. So the first step we wanna do is to rip the file or um yeah and ripping it. So what we're gonna do is we're gonna right click and we go to the option called R IP. So this will get the file ready for printing. So I'm gonna click that and you'll see a little status bar over here telling you how far the pro and the actual process is from being done. Just wait for that to load. This might differ depending on your machine, the speed of it, and obviously the um design. And it's how can I say sizes and quality and so forth. But I think what I'm gonna do, I'm gonna pause. Oh, never mind. It's done. So there we go. So now that it's done, there's two ways we're gonna go about it. The first way is, let's say you've set up a network printer, then you simply just right click it and then you say, send so straight forward and then that will send the file to your actual network printer and then take it from there. But let's say like us, you've set it up to save to an actual location, like as a file. Now, if you go right, click and send it will ask you to save it, as which is pretty much the same as going here to the options save as. But if you save to a file, it is probably the more correct way to go. So I'm gonna click, save as then what you do is you wanna lo, uh, locate the area you wanna save your files to. I'm gonna put it there with my the rest of the graphics, and then we call this. I'm gonna call this APR T. So we know this is the actual print version, so click save and then you will see another progress of it saying that it's saving. So now if I go to that same folder, we will see we've got our new file here, Ready for printing. So now this, you can either click put on a flash, drive copy to someone, or print it yourself. Now, if you wanted to print it on the same machine, then what you want to do is go to the cncu.co dot Z a website again in the same place you found your colour profiles. So if we scroll down, we've got the one for the textile and the normal one. I'm just gonna go textile for now. Go down and then you will see we have a folder called Print EXP. So that's the one you wanna look for. You can simply download it, install it and then what happens is you will open your file in that programme and then you can print it on the same machine, which is quite convenient. But yeah, otherwise that is it on finalising your files. Pretty straightforward. You want to rip it and I do it Either you want to send it or you wanna save it as and print it in the correct programme. But yeah, in the meanwhile, if we head here to softwaretraining.co.za. co dot Z a. You guys will notice we've got a variety of different Softwares we do cover and you can also isolate your search on the top. Right? But if you do not however, find the training videos you're looking for, just simply go here, request the training video, fill in the mini form and then we'll do our best to try and make that for you. But otherwise thanks, guys, for watching and cheers.


 sorin-sirbu-mx8PWBShxRE-unsplash

 alice-alinari-X4FDm3HwVA8-unsplash-index


 andrey-zvyagintsev-x0c6vTO5ibA-unsplash-Index