Object Rotation Transformation within the SAi FlexiPRINT RTUV 22 Software (Part 2)

flexiprint rotation transformation
Next up on our Transformation list we will be looking at the Rotation feature and its options.
When it comes to the Rotation Transformation feature, there are two main approaches that we are able to take.
This video is part of a Mini-Series.
Next video covers Resizing.
Previous video covered Duplicate.
Video Transcript
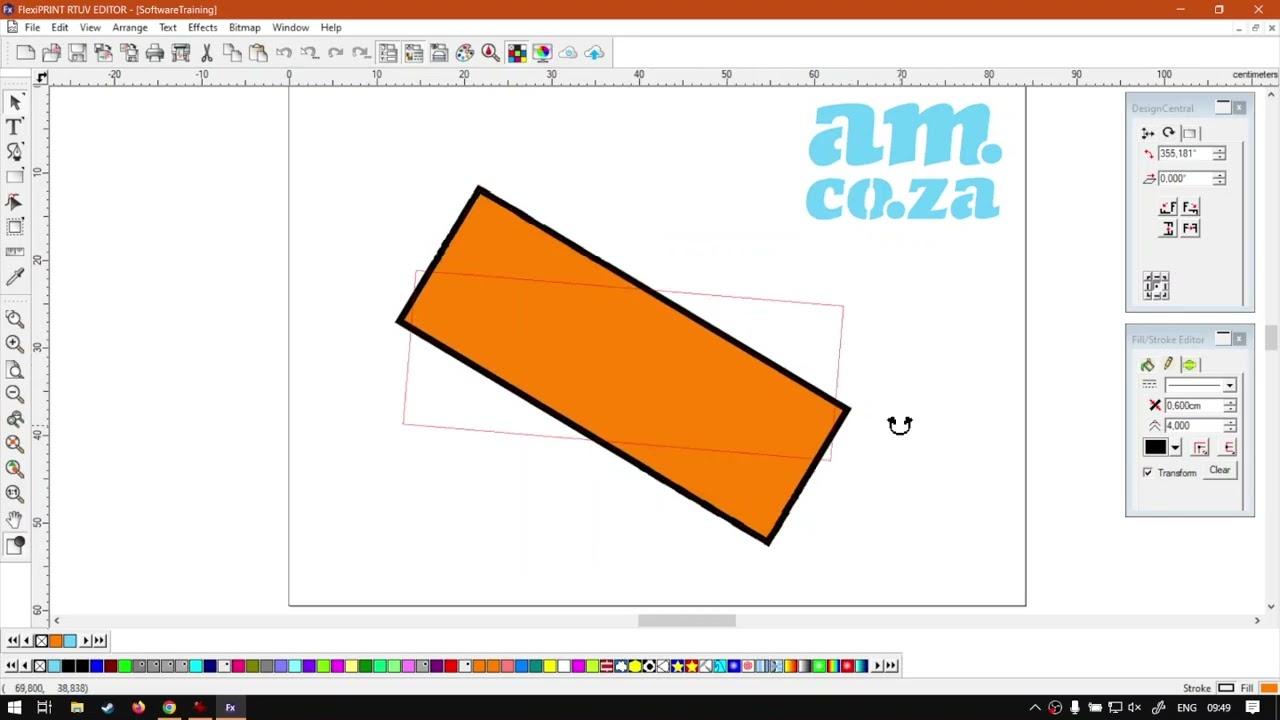
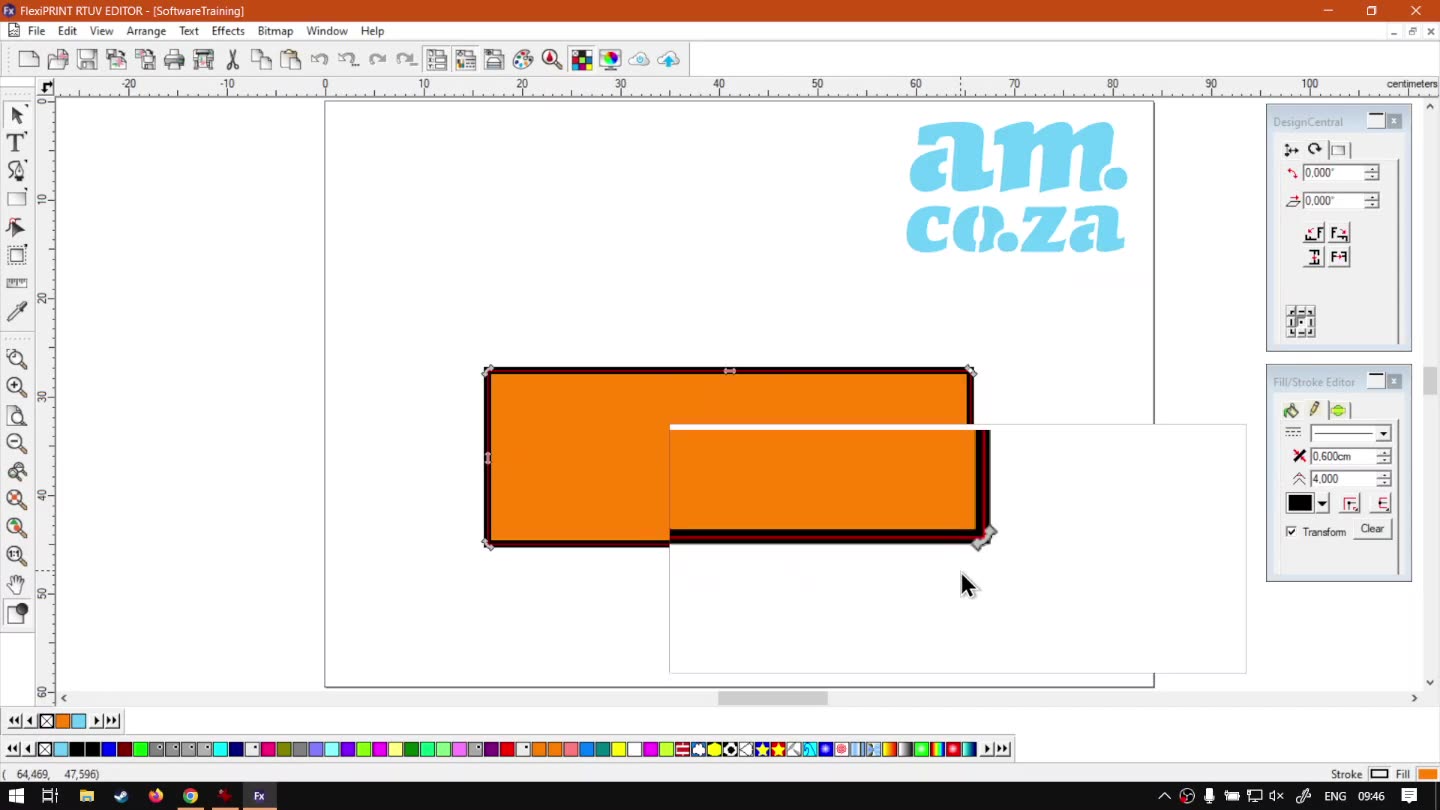
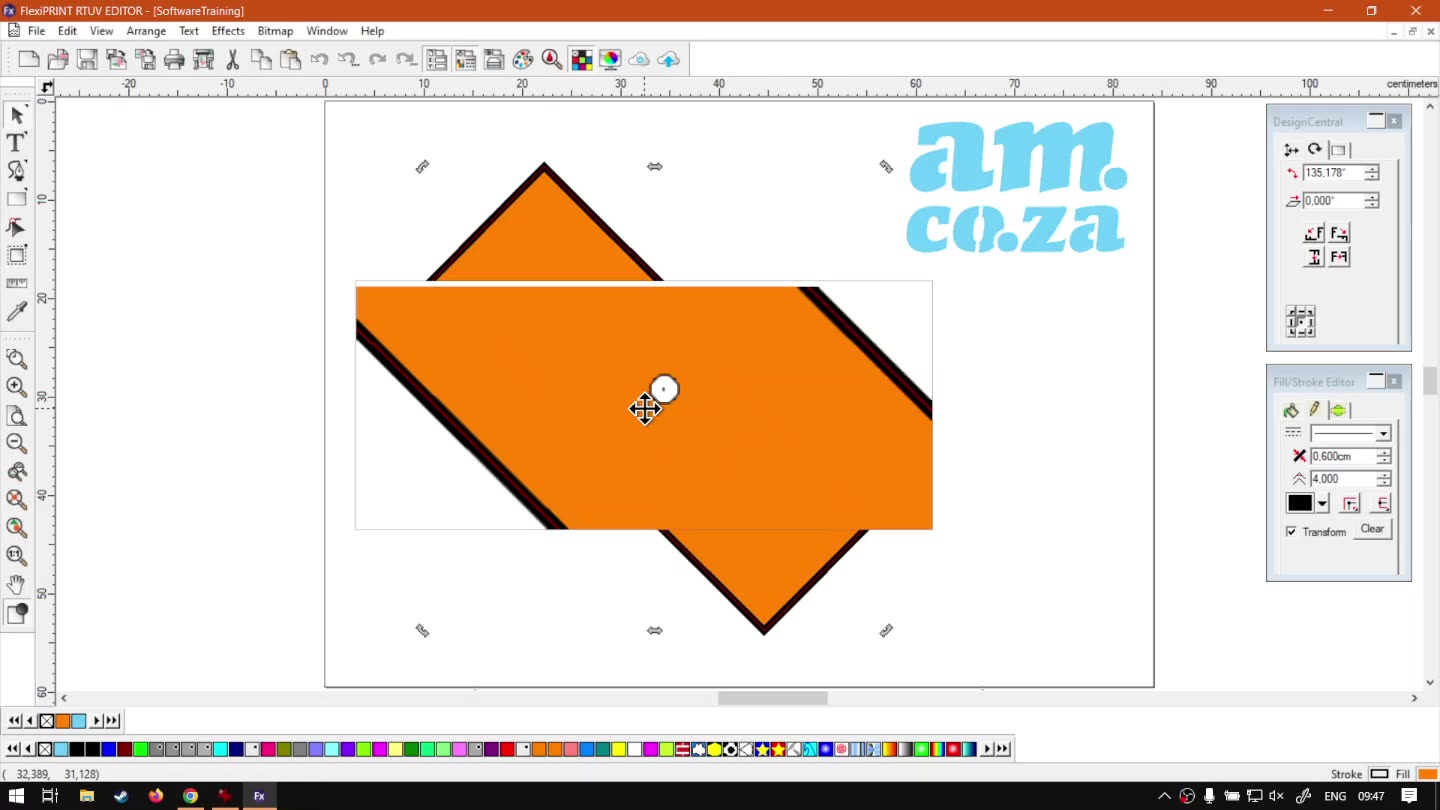
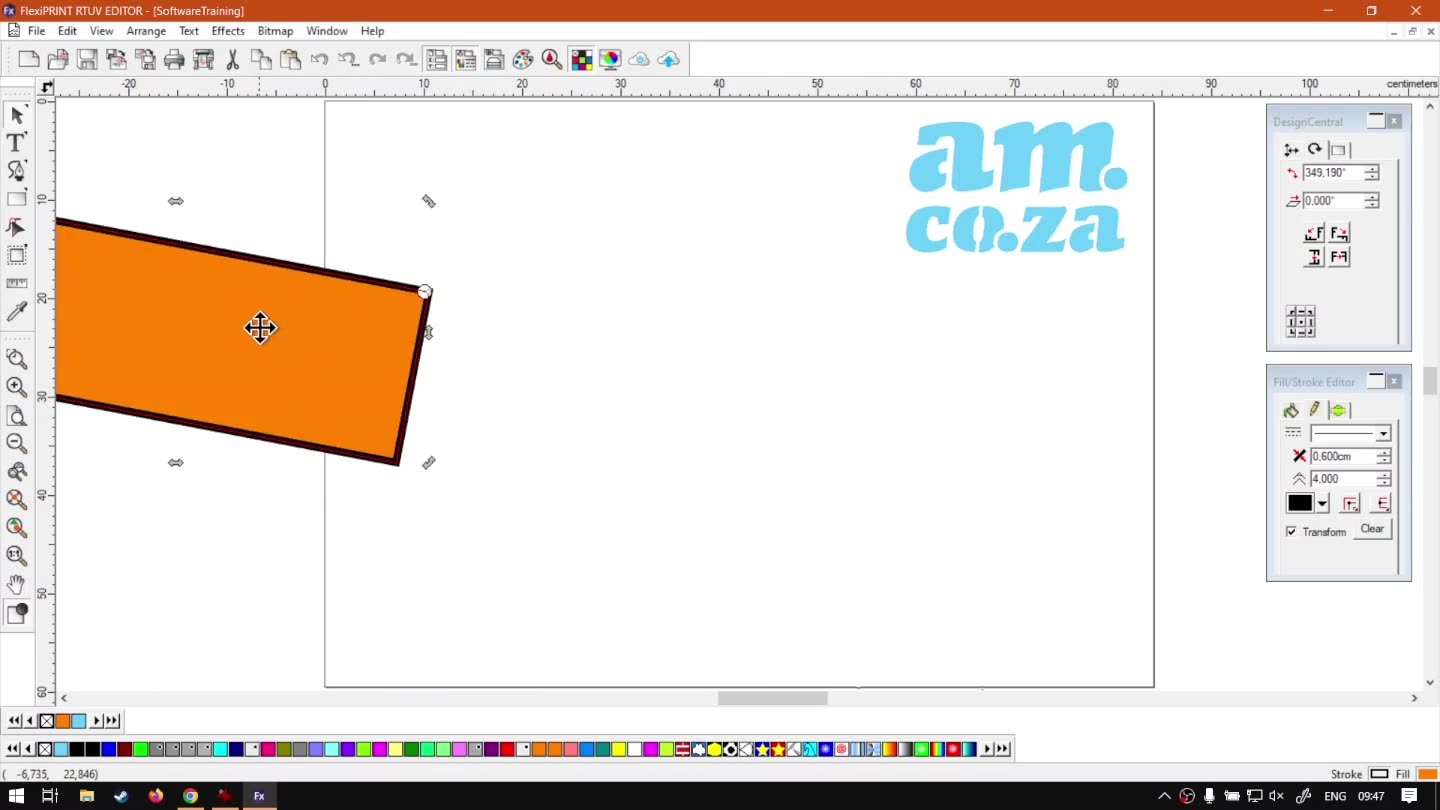
Hi guys. In today's video, we're going to be looking at rotating objects with in flexi print. But before that, let's have a quick intro first. So today's video can be found on softwaretraining.co.za. co dot Z A. We make sure and easy to watch problem solving videos, and we also have daily updates. Now, if I head into the programme here like I mentioned in the intro, we're gonna be looking at rotating objects. So let's just quickly create a rectangle so we can see something that is being rotated. Now when it comes to rotating, there's two main ways we can go about this. Um, yeah, I'm gonna cover the easiest one at first, but it's not necessarily the most precise. So in order to rotate, we wanna make sure our selection tool is enabled here or selected. Let me just fix the zoom there. So it's the first one on our secondary toolbar, and then with your shape selected, all you wanna do your scale is a bit up for the sake of the video is double click it. If I double click this, you might not have seen on the video, but these little node arms has changed. So I'm gonna try double click again, can say we've got a certain thing, then another thing. And then we've got the actual rotation arms. And if I hover over these, you can see my mouse cursor changes to a lower rotation icon. You know, if you can see it over there. So any one of these four corners, so not the in betweens. So the actual corners this will rotate your object or your shape. If I left click on that. Hold in and move. You will see. There, you get this red outline of where it's gonna rotate it to. Then I can simply if I let go, it will place it in that new rotation. Now there's another thing we can do. We can constrain this as well. So if I rotate and I keep shifting, it will do it in 45 degree increments. So you can see there. We can now go exactly 45 degree and rotate that we can change the, uh um increments that uses. But I will show you that a bit later then next up on this actual, uh, free and transform in the middle Here, you'll see we've got this little white dot Now, this is the origin of rotation. So if I rotate these arms, it's gonna rotate around this point. So if I wanted to, I can simply left click on this point and move it to a new location. Let's say I wanna rotate around that corner. Now, if I use any of these rotating arms, it doesn't matter where they are. It's gonna rotate it around that point, as you can see so we can rotate it like so around that point. Now, this point can also go outside of your design. So if I click it and I move it to the corner of the page here now, if I rotate this, it will rotate it around that point very handy. Um, little feature. If you wanna do specific rotations, just keep in mind. If you've confirmed it and you go back into rotation, it will reset the point to the centre. Now, let's say we want to change those increments of how much it it is rotated by. Then what we can do? I'm gonna kind of try and align this a bit more levelled now, uh, this is not really necessary. You can do it on the con, uh, design central panel as well. But what you wanna do? Go to your main menu on top? Let's fix the zoom and we go to edit and we navigate down till we find preferences. I'll open that and then under our general tab, our first one, you can see we've got here constrained angle the moment it said to 45 degree. But let's say I change this to 15. Maybe I want more control over it. So OK, now, if I rotate and keep shifting, you will see it does it in 15 degree increments. So this is sometimes handy if you wanna have um, like I say, more control over the, uh rotation without it just being completely free hand so you can calculate it more easily. I'm gonna go and set that back to the default just now, Make a video in the future and you guys are like my programme is not working like yours might be confusing. Now, another thing. Let's say I wanted to set this exactly back to its original rotation. You can see that can be quite tricky. And that's where the design central comes in handy where this is, um, a place where you can do exact rotations. So if I zoom in here on the right, make sure your design central is open, you will see you can find it here on your, uh, primary or main toolbar. Just simply click that and then it will open it. Then make sure you navigate to the second tab by default. It will be on the first go to the second one with that little arrow that spins, it's for rotation and then you'll see the first option here is the rotation. So now if I want to set this back to exactly zero degrees, I can highlight that press zero press enter, and then it will reset it. So I'm just gonna make it more obvious. So let's say you wanna go back to zero. Set it to zero now. Likewise, you can obviously set an exact, uh, mount. Let's say I want to go, uh, 34.5 degrees. I think it's comma five. There we go. Then I can do that. I can set it to exact amount of degrees of rotation in this section very handy. And then at the bottom. Here you will see we have this little weird rectangle with little subsections that we can select now, like with a free hand where we can click this thing and move it around. Now we can set it here as well. So let's just default this back to zero so you can see nicely. But this will constrain it to your actual design, the selection within your design. So if I go top left corner, we'll move that little dot bottom right and then centre. So that's also a quick way. You can do it. But the beauty is like I said in the design central, you can go exact measurements, so if you need something very precise, But if you kind of just aligning things, getting things more or less right there in the free hand is definitely quicker. So just a quick recap. So we've got the tool. We've got a free hand rotation and the design central the freehand. You wanna make sure with your selection tool, you double click. So you get these little rotating arms, then you can rotate it from there and then with the design central, just make sure it's open and you go to the second tab and then you can adjust the rotation and origin from there. And then, obviously just for constraints, make sure you keep shifting left, click and drag those rotation points. But yeah, otherwise, that is it on, uh, the basic transformation for rotation. And meanwhile, though, if we head here to softwaretraining.co.za. co dot Z a, you guys will notice we've got a variety of different Softwares we do cover, and you can also isolate your search here on the top, right? If you do not find the training videos you're looking for, just simply go. Yeah, request the training video, fill in the mini form, and then we'll do our best to try and make that for you. But otherwise thanks, guys, for watching and cheers.


 pexels-cottonbro-5379191-index


