FabriCAM Software Scene Setup for Auto Nesting Tool (Part 2) Step by Step Video Tutorial


fabricam nesting scene setup
When it comes to the Auto Nesting tool and all its options, we want to first setup a scene that will help to demonstrate all its feature.
The process of setting up a scene for the Auto Nesting tool will be pretty standard, but with a few specific shapes.
This video is part of a Mini-Series.
Next video covers Sheet Preview.
Previous video covered About Nesting.
Video Transcript
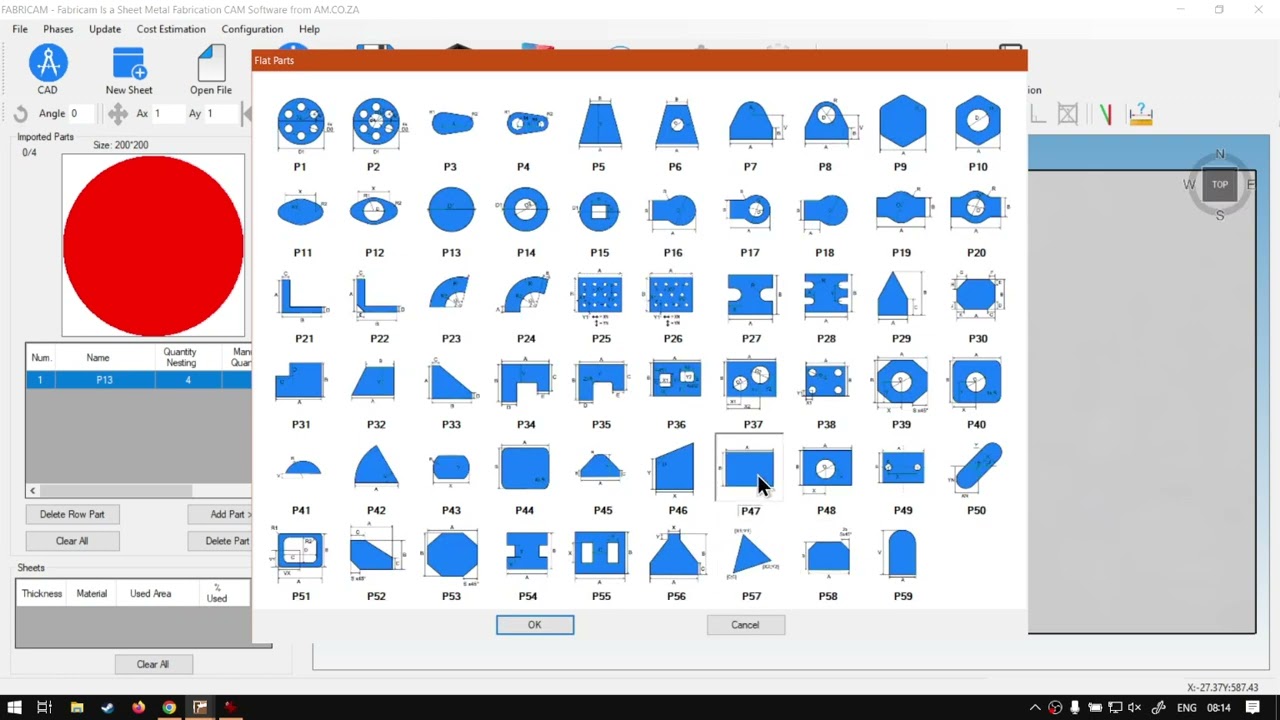
How are you guys today in fabric camp? We're gonna be setting up a basic scene for our nesting feature. But before that, let's have a quick intro first. So today's video can be found on softwaretraining.co.za z. We make sure we need you to watch problem solving videos, and we also have daily updates. Otherwise, we're back to the tutorial here. So now, in order to showcase the nesting feature and its options, we're gonna have to first set up a basic scene. And this will be, um, to them are all of the features. Now, I'm gonna add a few different random shapes just so that you can see at the end what happens with some of these options. But you have to start off. Let's first go and make a new sheet, then I'm just gonna go 2000 by 1000. I'm gonna set the beam diameter to one and say, Okay, I've got our basic shit in here, and I'm gonna add some flat parts. I wanna go to the flat part feature. Let's put a few circles, make it with 200 or the diameter, and then it is important year. You want to go to quantity nesting and, uh, set this number, especially if you want to do some auto nesting. It's gonna zoom in here so you guys can see that better. So quantity nesting. Wanna just this one? Okay, I'm gonna go this to about four, and then we say, add, and then we can see you on our left. We've got the first part with four for nesting. And let's add a few other shapes. I'm gonna make some form of rectangle and to make us about 100 by 300 it's gonna see what this looks like. I should be fine. I'm gonna do the same thing here. We got 44 now this 13 add. Now we've got that shape as well. And then one last shapes maybe grab something like this. How will shape? Now I'm gonna make this about 200 make the B 1 50 is the worth of this l shape. And then these ones will make about Audie and Body to see what shape looks like. It would be nice. So we can just see for some of the other features, um, to actually see it in effect, I'm gonna go this one about five, maybe and say add, Here we go. Now we've got our basic shapes. We've got our sheet set up and we are ready for Should I say to start playing with the nesting feature now it is important. Like I said, um, that you had the quantity nesting and not manual quantity. Otherwise, the nesting feature is not gonna work correctly. So just keep that in mind. So just to recap, we've basically set up a plane or a working sheet, which is metal with our shapes that has, uh, quantity nesting amounts. But yeah, Otherwise, before we get to the next video, if you hit you, just softwaretraining.co.za. You will notice we've got a variety of different Softwares we do cover. And you can also isolate your search on the top. Right? If you do not, however, find the training videos you're looking forward. Just simply go. Yeah, request the training video filling the uniform, and then we'll do our best to try and make that for you. But otherwise thanks, guys, for watching and cheers