FabriCAM Software P4 Advanced Flat Pully Looking Shape (Part 3) Step by Step Video Tutorial


fabricam flat pully looking shape
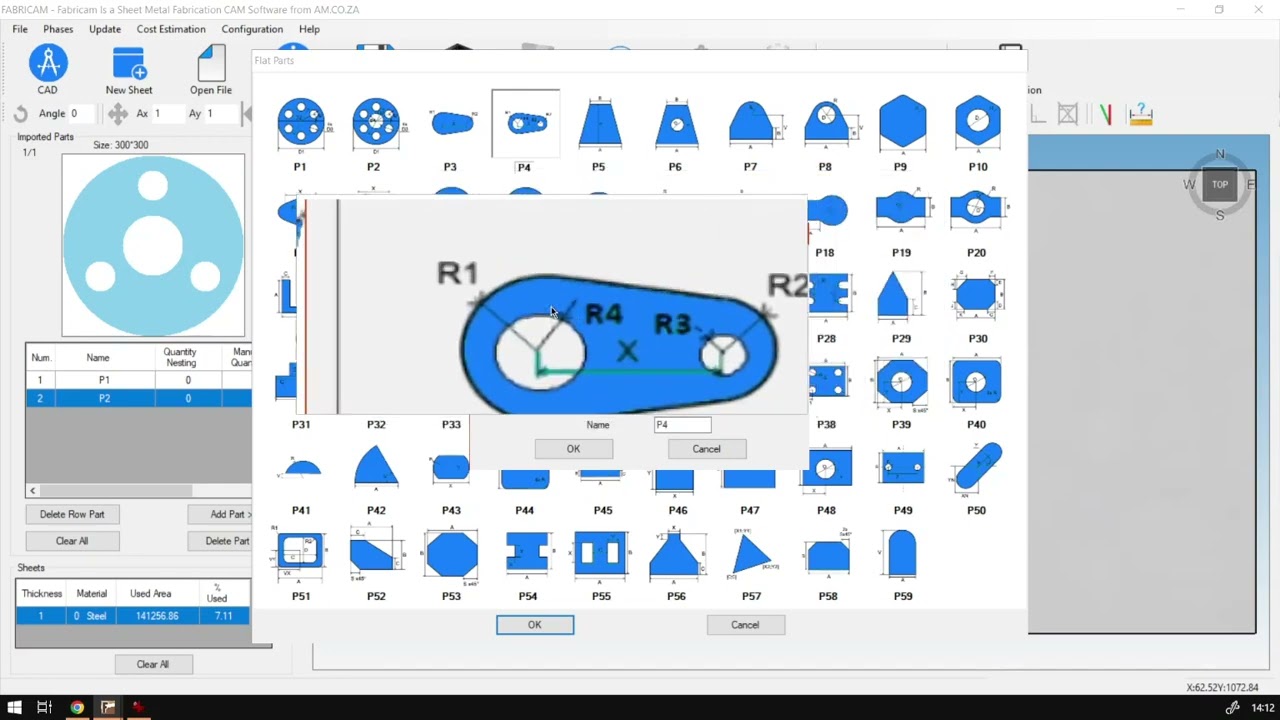
In today’s shape we are going to yet again take another Intermediate part and turn it into an Advanced one.
This shape when you set the options quite extreme, you are able to get an almost pully looking shape.
This video is part of a Mini-Series.
Next video covers P5 Eskimo Looking Shape.
Previous video covered P2 More Circle Cut Outs.
Video Transcript
are you guys in today's video? We're gonna be looking at part number four, and this will be from our advanced flat parts. But before that, let's have a quick intro first. So today's video can be found on, uh softwaretraining.co.za. We make sure needs to watch problem solving videos, and we also have daily updates. Otherwise, we're back into the programme here. Now today's shape part for some of you might recognise it from part three, uh, part number three from our intermediate flat pots. Now, there's obviously gonna be a bit more advanced version of it. So if we hate you too, flat parts go to p four and then select that. And then from my little menu here, we can see we have five different settings beside here. We can also see those five settings. So first of all, we've got X, which is the with. So let us set this. I'm gonna make this maybe something like 400 their next up here. We've got the rounding one and rounding to which is on the side. So we go around in one. Make this, it's got 200 then rounding one. I'm gonna make 100 less. So 100. So this is the right side. It's going to keep in mind the next setting. Our three, um is the circle on this side. So you'd imagine, because we just went from side to side, We will go side side again. But now you're side side and then right to left. So this one I wanna try. Let's make this just 10 smaller, so I'm gonna go 90 and they do the same with the top one. So we go 190 to remove one of the zeros. Now, if we had to preview this, you'll see we get almost like a pulley looking system going here. So it's got some form of belt on with your circles. It's obviously not what you're gonna be doing. I'm just messing around for the sake of the tutorial. You'll obviously add in your relevant information and measurements, but yeah, I thought it looks really fancy like this. Let's go. One so added. And then we add this to our actual shape. There we go. We've got a full made it maybe a little bit large. So I think what we can do is let's just throw this one inside the centre and then select both of these and move it back up so we don't take up too much space. So there we go. That is part number four. It is a handy tool. And like I say, it's advanced version of part number three. But yeah, otherwise, we head here to softwaretraining.co.za z. You guys will notice we've got a variety of different Softwares we do cover, and you can also isolate your search on the top, right? If you do not, however, find the training videos you're looking forward. Just simply go. Yeah, request the training video filling the new form. And then we'll do our best to try and make that for you. But otherwise thanks, guys, for watching and just


 allef-vinicius-wN5YSdsyZDE-unsplash-Index


