TruCUT RDWorks the LGP Spacing for Circle Type (Part 13) LGP Design Videos Mini-Series


rdworks lgp circle spacing
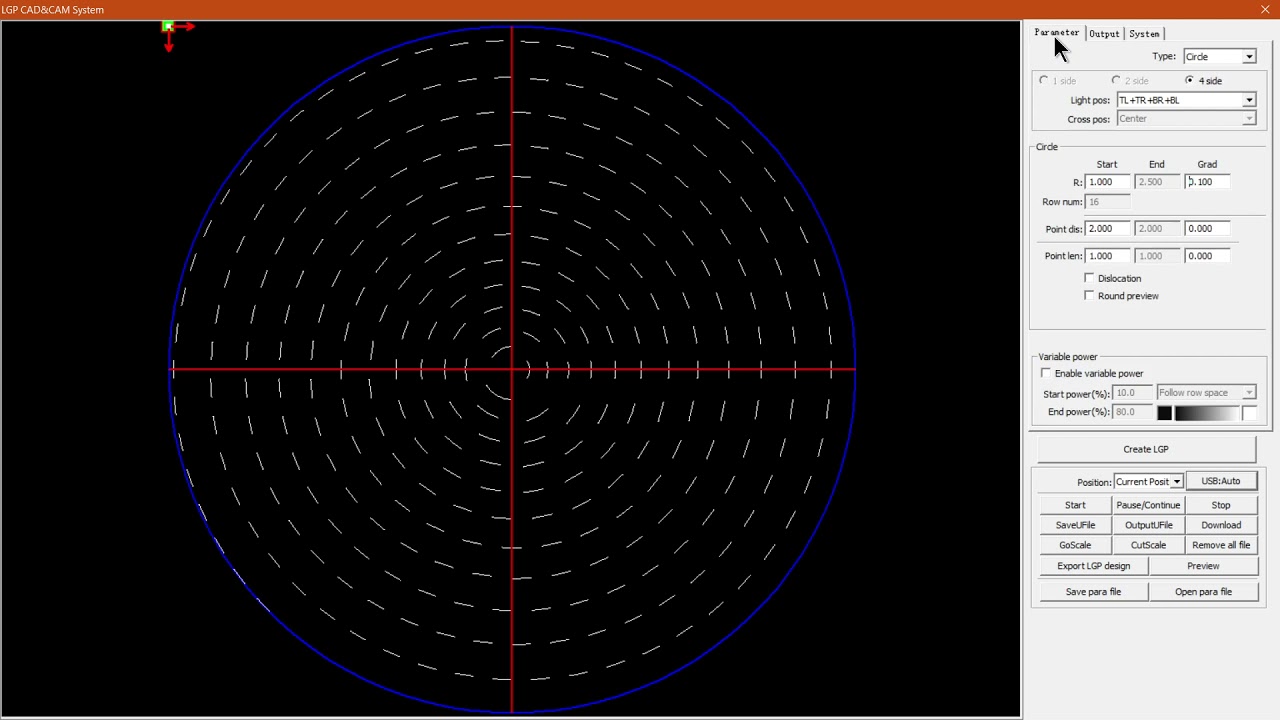
When it comes to spacing a Circle type flow, it is not quite the same as setting Rows and Columns.
In this type of layout, we will have to look at the spacing in another way, which we will be doing in this video.
This video is part of a Mini-Series.
Next video covers LGP Design – Point Length.
Previous video covered LGP Design – Circle Type.
Video Transcript
How are you guys in today's video? We're gonna be looking at setting your circle Spacing, um, within l g p design. And this will be four true cut are the works. But before that, let's have a quick intro first. Yeah, so today's video can be found on softwaretraining.co.za z. We make sure that easy to watch problem solving videos and also daily updates. Otherwise, back in the programme here. Just so you guys remember, at least for those that are new this is a miniseries on L G. P Design and I will leave relevant links and descriptions. You guys gonna should follow along now when it comes to circle spacing. This is very similar in many ways to when we did the line spacing, Um, in some previous videos, it's just the values and that look a bit different or should rather say the names and that of the settings. So now if I go on my draw bar, open LGBT design and then I'm just gonna make it quick sample. Yeah, I'm gonna put on a lip spur 40 size and then make sure my type years on the circle, But you guys can see it is now under the settings for the circle. We've got your circle. Then we've got our and then we also have the point distance. So we'll be looking at these and then see what we have under here. So now if you guys can remember previously, we had row and column. So now we are. And this will be pretty much the spacing between all these lights. So if I had to increase this, let's make this five. So I apply. And now you can see we've got quite a space between every next line. So that is what the first setting will do under our then. Obviously we've got a gradient as well. So I'm gonna set this back to one quick so we can just see the gradient play. No, let's set this. This may be good. Went one for now. Click apply. And now maybe a bit little. But as you can see, it slowly starts increasing the spacing between them. So it works more on a gradient. For now, there is a general rule normally that if, um should I say that, uh, cut out and that's close to the light source can be more spaced, and the further away they get, the closer you want them to each other. So you can always do this with size as well. So you have a lot of ones here, and you have less, less less As you get closer to the light source obviously have to play with us to get a good setting. But as a general, an idea. So let me set these ones back to zero. We're going to look at the next sitting. Okay? First one needs to be one, actually. Now, under the settings next one we have here is point distance. So over a year now and we can set the distance or the spacing between these lines. So if I had to increase this, let's make this maybe five. See what that looks like. Click apply. Now, you can see we've got quiet, odd looking thing here, so I'm gonna increase this as well. So it's not so many lines. So now you can actually see here. We've got between all of these things quite a large space. I can actually play around with that, like always, But let's just go and set this space into one again, and we look at a bit of a gradient. So once again, I'm gonna do maybe 10.2 so we can see the effect a bit better. We also set this one back to one, so click apply. And now, as it goes in a circle, you can slowly see it starts creating a spacing. It gets bigger and bigger and bigger and bigger. Well, eventually you have this quite a big space going around. So, like with the lines, you can do the gradient spacing and you can do just the default spacing. So all of them will be space together or have a gradient. Otherwise, that is it on the r and the point distance. So the one will set the spacing between these, um lines and the other one will set the spacing between the points running along the line and then obviously can do gradients for birth like I mentioned. Well, that is it on the spacing. So if we head here to softwaretraining.co.za got here today, guys don't notice. You've got a variety of from software's, you recover, and also you can isolate your search on the top of right. If You do not, however, find videos you're looking for just simply a year. Request a training video, fill in the reform, and then we'll do our best to make that for you. But otherwise thanks, guys, for watching and cheers.


 thanh-duc-phan-oQmsJCeYH2c-unsplash


