Using Straight Lines with the Path Tool in the SAi FlexiPRINT RTUV 22 Software (Part 2)

flexiprint straight lines path
When it comes to the Path Tool, we have two main types of Paths that we are able to create.
These path type will be very important to the design approach, they can be combines in a shape but will always be one of the two types between nodes.
This video is part of a Mini-Series.
Next video covers Curved Lines.
Previous video covered Open vs Closed.
Video Transcript
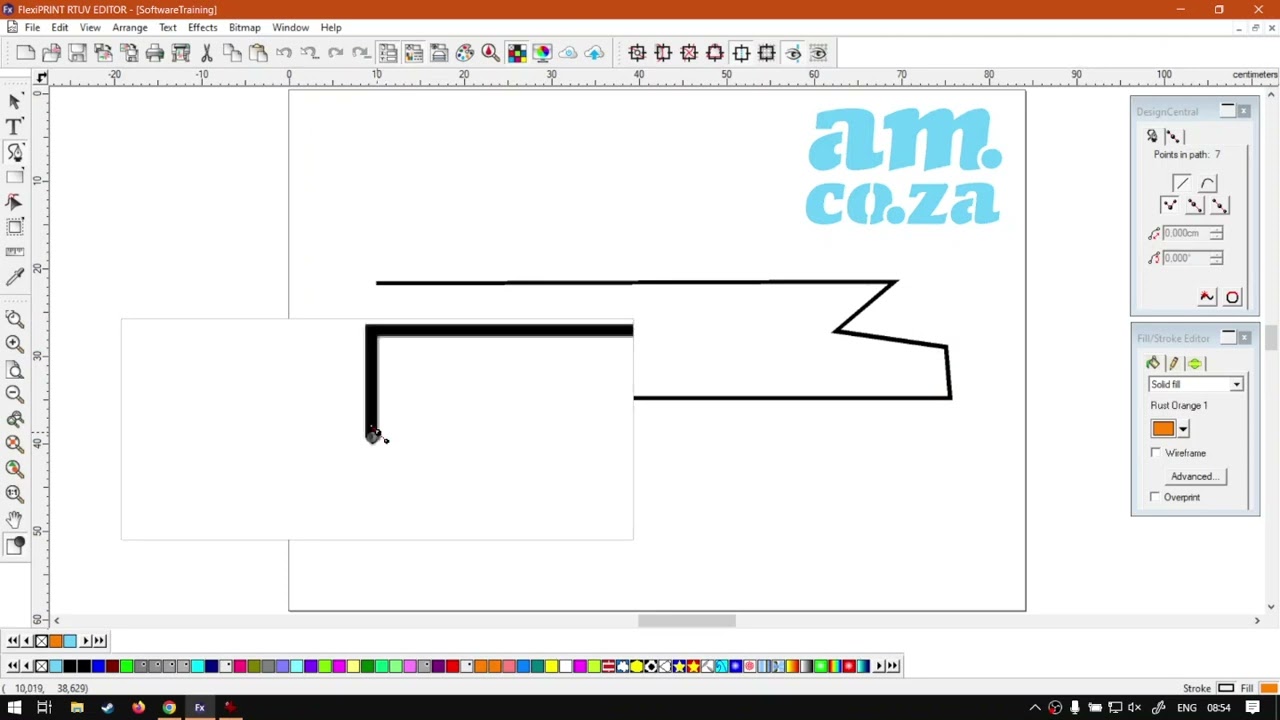
Yeah, All righty guys. In today's video, we're going to be looking at creating some straight lines with our path to. But before that, let's have a quick intro first. So today's video can be found on softwaretraining.co.za. co dot Z A. We make short and easy to watch problem solving videos, and we also have daily updates. Now if we get into the programme here. So like I mentioned, we're going to be looking at creating some straight paths or straight lines now by default. If we use our path tool, which the short cut is P or we can just use it on our secondary tool by here, click it and make sure it is on the path tool and not the actual free drawing. So now, with the path tool selected, like I said, by default it we creating straight lines. So if I had to click or left, click somewhere, click another area and it will create a straight line for us. Now, um, let's say you wanna, uh how can I say restrain the line, though that is where it gets slightly different. Because if I want to make, uh, exactly, uh, should I say lines as parallel with horizontal vertical. Um, And then what we wanna do is we wanna actually use a modifier. Because as you can see, this top line here it is not 100% straight. It kind of curves up from the left to the right. As you can see this, we've got these little steps in it. So now if I want to make a straight line from right to left here, what I can do is I keep shifting and I simply click more or less in the area. I want to put it in. Then it will constrain that same way. If I wanna get down, I wanna put it here. If I click a bit to the right, let me zoom in So you guys can see nicely. So let's say I wanna make a straight line down to here, but I click a bit to the right. Now if I keep shifting and I click, you'll see it restrains it on our actual, um, vertical plane or vertical angle. Now, this is gonna be relevant to what it is set up in your preferences. So if I go to, um on top on our main menu edit, and then we go down till we find preferences. Then you will see you on the constraint angle we have at the moment set of 45 degrees, so it will jump between 45 degrees. So if I go, yeah, keep shifting, then it will take it in 45. So basically, at the moment, it's gonna Yeah, constrain it on the horizontal vertical and 40 fives in between. Well, let's try to get a 45 there, so this is very handy. If you wanna have a nice, clean lines, you can always use this. You can obviously adjust it afterwards if you need to fine tune it. But just to get the template going, this is a great way to go about it. And, uh, yeah, so just a quick recap. So, like I said, by default, the path tool will be creating straight lines if you just left click. But they, um you know, they won't be 100% straight. Or should I say, uh, on the horizontal and vertical angles or 45 as well? So now if I keep shifting, I click and then I can get nice and clean uh, lines over there, which I can work with, but yeah. So otherwise that is it on creating straight lines. Pretty straightforward, no pun intended, but yeah. Uh, otherwise, if we head here to softwaretraining.co.za. co dot Z A you guys will notice We've got a variety of different Softwares we do cover. And you can also isolate your search here on the top, Right? If you do not find the training videos you're looking for, just simply go. Yeah, request the training video, fill in the mini form, and then we'll do our best to try and make that for you. But otherwise thanks, guys, for watching and cheers.