Differences in Print vs Rip and Print within the SAi FlexiPRINT RTUV 22 Software (Part 3)

flexiprint print rip difference
When it comes to printing your design within FlexiPRINT, there are two main ways to go about it.
The first approach is a more classic printing type, as where the second follows your more corporate approach.
This video is part of a Mini-Series.
Next video covers Copy, Cut & Paste.
Previous video covered Import & Export.
Video Transcript
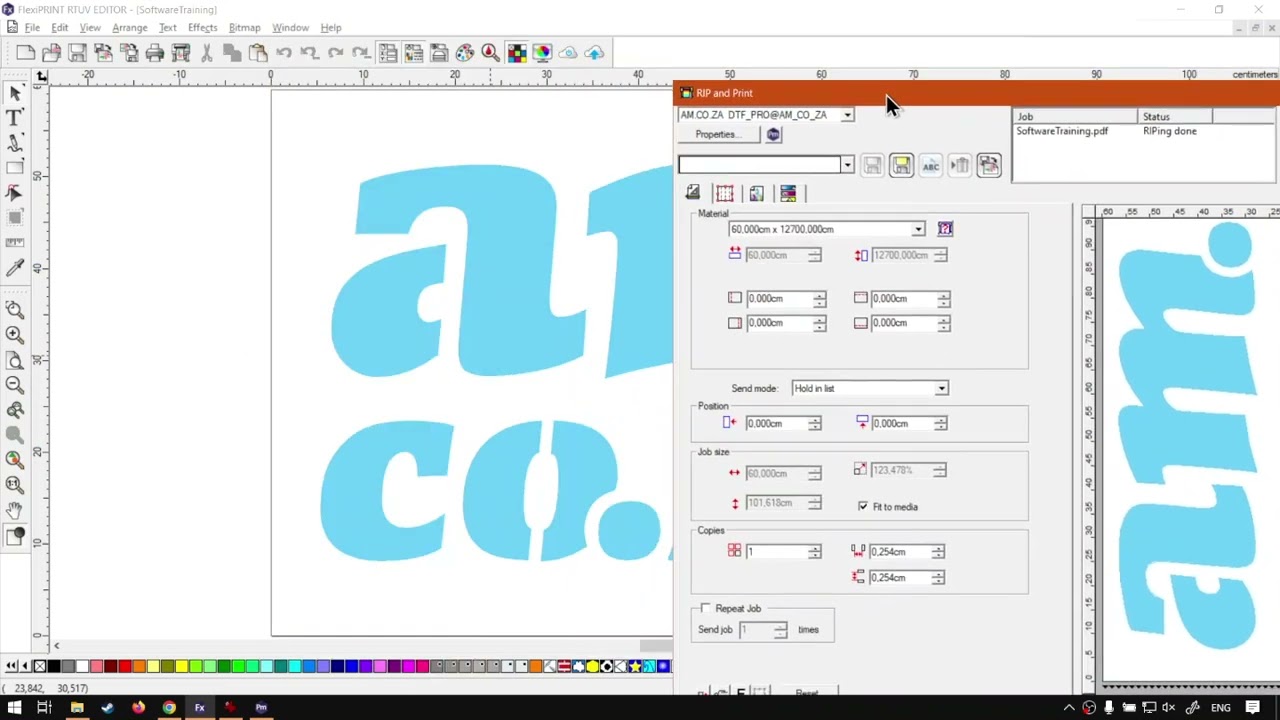
Alright guys, in today's miseries, we're gonna be looking at our main toolbar again and the features print versus rip and print, and this will be done with in flexi print. But before that, let's have a quick intro first. So today's video can be found on softwaretraining.co.za. co dot Z A. We make short and easy to watch problem solving videos and we also have daily updates. Otherwise we added to the programme here, we're gonna carry on with our, uh, main tool on top here, the mini series on it. Previously, we looked at these, uh, five features in front of new open save Import export. Now we're finally getting to the print and rip and print, so we're just gonna be looking at the main differences. We're not gonna go into depth on these features just yet. We'll maybe do a mini series because there's quite a lot to cover. So the first one we have here is print. Now, with my design open, if I go here to print, this will pretty much just open up our classic printer. It's just telling me my orientation. That's not correct. So I'm gonna say OK, now this is like if you've done any normal printing, you'll understand most of these settings. So we've got here. We can even save this to or print this to a PDF and so forth. So if you're not doing any proper printing through a vinyl cutter or anything like that, this will be the printing you'll be using. We've got some nice features where you can use selection only or add stuff like guides and grids and so forth. But most of these things you should understand quite easily. So that is our printers. We'll be using some local printer basic printer, nothing too special. Now the next option you will have is the rip and print. Now this is, let's say you've got a vinyl cutter printer set up, and then what this will do. It will communicate between the printer and the programme, and then you can make nice custom adjustments and do the printing and ripping. So I'm gonna click this for now, it's gonna ask you which kind of printer, where is it located? Is it local on this computer network or Internet address? I'm just gonna say this computer. I currently don't have one set up, but you'll be able to see all the features or most of the features required. Just wait for that to load. It should open our production manager as well. So in the background, it's open. This is just in the actual flexi print. We've got our features here, and then we've got the production manager over here, and we're gonna go back to Flexi Print. Now, we've done a mini series on the basics of this. We're still gonna create one on advance. So if you wanna do advanced printing, we'll go through this. But the general rule is the difference between print and rip and print. Like I said, the print we use like a local printer that is maybe, just like a normal, uh, printer, where if you want something like a more advanced industrial type vinyl and print, this will be the rip and print, and what the rip will do is it will transform all the information on this design to, uh, be relevant and compatible with the actual printer. So if we've got vector designs and images and all of that, it will convert it, make the vectors into a raster that's, uh, relevant to the size of the printer, and then we can adjust all these properties to set it up. More customary, it will also turn your R GB colours to actual CMYK. So it's more accurate now. Obviously, we have different sending. I'm just got mine here on holding list. So if I remove this one, so hold one, say yes. And then at the moment mine is set on holding list. So when I click send, it's gonna send it to our production manager just in holding. Otherwise, we're gonna start printing and all of that. Now, when you're ready, you can simply just click rip. And then, as you can see here with the status, it's showing us here that it is busy ripping it how far it is. So, like I said, this will convert all the colours and the vectors and all that. So it is, uh, compatible with your actual printer. But yeah, otherwise, that is it. On the two differences on the rip and print and print, and, uh, it will be handy. This is obviously a very important feature because I mean, this is part of flexi. Print is the print side, so we'll definitely go into more depth on these and how to competently use them. But yeah, otherwise, in the meanwhile, before we carry on with this tool bar. If we head here to softwaretraining.co.za. co dot Z a, you guys will notice we've got a variety of different Softwares we do cover. And you can also isolate your search on the top, right? If you do not, however, find the training videos you're looking for, just simply go. Yeah, request a training video, fill in the mini form, and then we'll do our basically try and make that for you. But otherwise thanks, guys, for watching and cheers.


 pexels-domenico-paolella-6058231-Index


 dalton-smith-e42tzLa1aK4-unsplash