SAi FlexiSTARTER 19 Margins with the (DC) Tab (Part 3) Design Central Video Mini-Series


flexistarter design setting margins
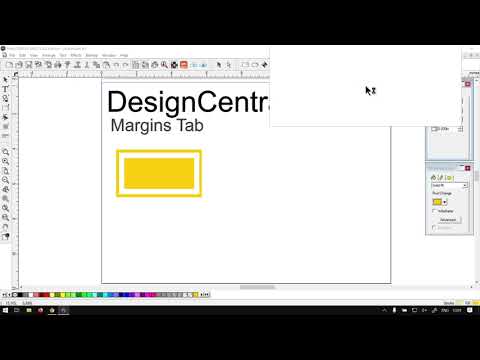
Using the Margins tab to specify the margins around a design area. This is great for keeping a safe area around your design as a form of a safety net (Bleed).
This video is part of a Mini-Series that has an in-depth look at the Design Central panel.
Next video covers the Scale Tab.
Previous video covered the Document Tab.
Video Transcript
How are you guys in today's video? Flexi starter. We're gonna be looking at the margins Tap on the design Central pan. But before that, let's have a great intro first. Mm. So today's video can be found on softwaretraining.co.za hat Seattle today we make short and easy to watch problem solving videos and we have daily updates that was back in the programme. Yet now, just a reminder. This is a mini serious on the design central or design central panel. And then today we're gonna be looking at the margins tap, which is, or the documents properties. So I will also leave relevant links and description so you guys can follow along. And yeah, as you can remember, the previous video. If you've watched that, we covered the document property. So today we're gonna look at the margins tab and then, first of all, to make sure you can locate it seeing that the science central works according to whatever you are selected, What we wanna do is select anywhere on the white space. Then you'll see it takes us to our document tab or document properties. We can also locate this by going to our main menu on top when we go to file and we navigate down till we find documents set, don't be as a shortcut should take her to the same place. Now if we go to our design Central. Obviously, if this is not open, which unfortunately have to add to most of their videos just in case you can always find it here next to your undo and redo. There's a little button there. Just click that open for you, but otherwise back to the margin. So obviously, the margin it's a It's a nice way to set kind of bleed area for your design. So if anything goes, you know you have some room for errors before it is the trim line. So now this is a common in printing and so forth. So, uh, in order to do that, you know, obviously just adjust these parameters and then you can see the little blue lines come up showing you where or bleed line here. So this helps if you wanna kind of stay within certain area as well we're designing, so you don't actually get too close to the border, and then your final print. Some of the graphics might be cut out. So, in general is a good practise to work with a bit of a bleak line or the margins. You can, uh, be according to each project or according to your printer and colour. What works best for you? My guess. I'll just leave it 0.2 of an inch and then, uh yeah. So nice thing about the, uh, margins as well is you can make objects snap to it, so it doesn't easily go past. So if I'm select, just grab it with tangle and make a copy of it. But in order for this to work, unfortunately, you have to go to view by default. I think it should be on, but otherwise I'll just show you to the view and we want to navigate toy, find snap. Then we might want to make sure snap to guide is selected the moment mine is. So then what will happen by just scale this to the edge. You'll see it snaps to it. So that way, if you want to use it as a part of your design, like, let's say you want to put a background or something like that, you always use that. Mm. Keep in mind if you're moving, it's not gonna necessarily snap it so But if you are for some reason designing and you're working and keeps wanting to snap there like a magnet, it's rather annoying. And you always got to view snap, and we just deselect that. Then while you're designing, you can see I can get very close and I won't snap it at all. But if some reason you want to use the margins as part of your designed to, like I said a border or something like that you can always use. Here's your snap to guides on. Otherwise that is it on the margins tap we had here to softwaretraining.co.za girls here today. You guys will notice we have a variety of different software to cover. Also, we have this little search options so you can always type in what you're looking for. Heat the little magnifying glass button, and it will try and find that video for you. But if you still run dry and get no result, you can always go here requesting training video. Then we will make that video for you. Otherwise, thanks guys for watching and cheers


 aleni-stoakes-16MhQnEhUTk-unsplash-index


